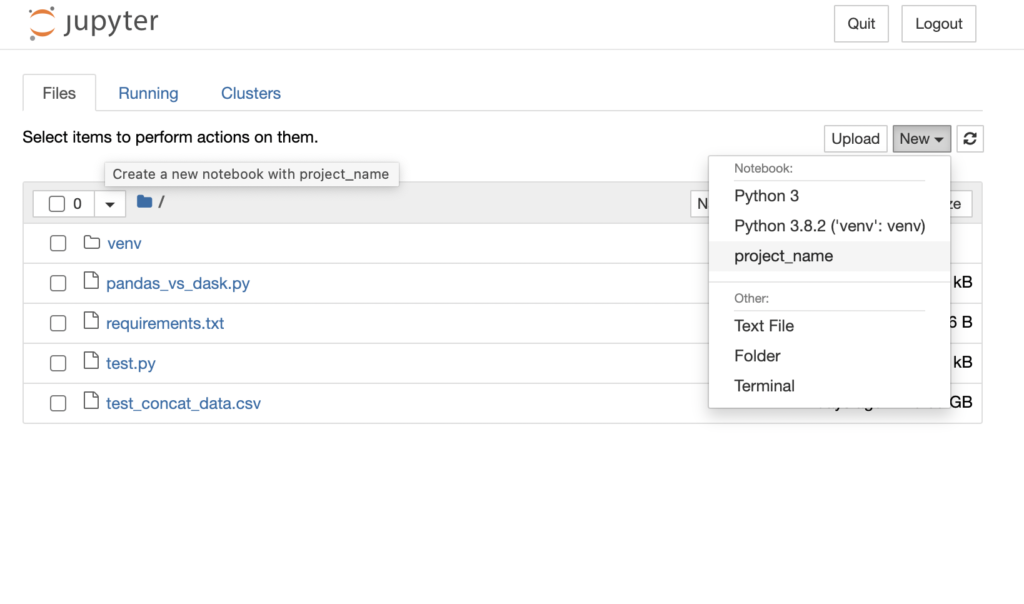
Jupyter Notebook is an effective tool to explore and visualize data, but unlike calling a .py file, it requires additional steps for a particular Jupyter notebook to utilize the libraries sitting in the same virtual environment folder of the project that you are currently working on. And being able to use the same set of libraries with other files in the project folder makes your project less error prone. Today, we are going to talk about these steps to align a Jupyter notebook’s kernel with the project’s virtual environment.
- Create a project_folder, create a virtual environment within the project folder and activate the virtual environment
mkdir project_name
cd project_name
python3 -m venv venv
source ./venv/bin/activate
2. Install Jupyter Notebook and project kernel within the virtual environment
(venv) pip install jupyter
(venv) ipython kernel install --user --name=project_name
3. Start a Jupyter notebook server and select the kernel previously created.
#command to start a Jupyter notebook server
jupyter notebook

As you can see, now the started notebook is connected to the kernel, project_name.

4. List and Delete installed Jupyter kernels.
#list installed kernels:
jupyter kernelspec list
#delete an installed kernel:
jupyter kernelspec uninstall project_name
Thank you for tuning in today. We will see you next week :).

